
How to set up Static IP on a SmartNID
If you already have a C5500XK SmartNID attached to the wall, use these instructions to set up Static IP. You can sign in to the settings (GUI) for your SmartNID to manage setup as shown in the steps below.
Sign in to your Modem GUI (SmartNID settings)
1. Using an Ethernet cable, plug a computer into the LAN port on the bottom of your C5500XK smartNID. Open a browser window and type http://192.168.0.1 into the web address field.
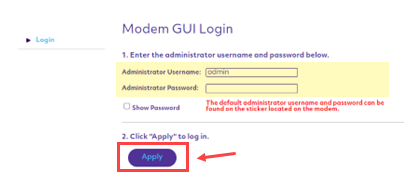
2. Sign in to the Modem GUI (SmartNID settings) using the Admin Username and Admin Password. These are printed on the sticker on the front of your SmartNID.
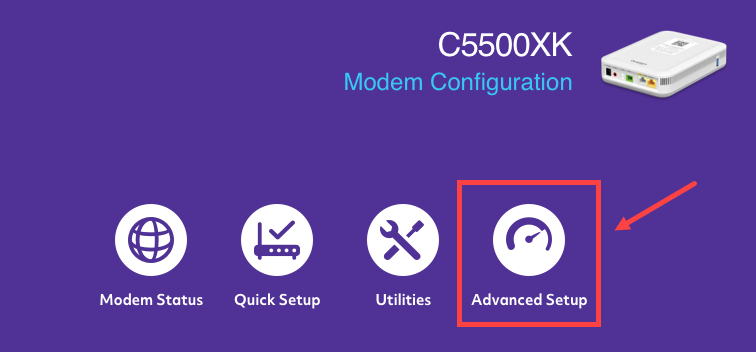
3. Select Advanced Setup from the main menu.
Configure your IP addresses in LAN Subnets
Choose your static IP setup option below to see detailed instructions. You can choose the single static IP address option, or multiple addresses.
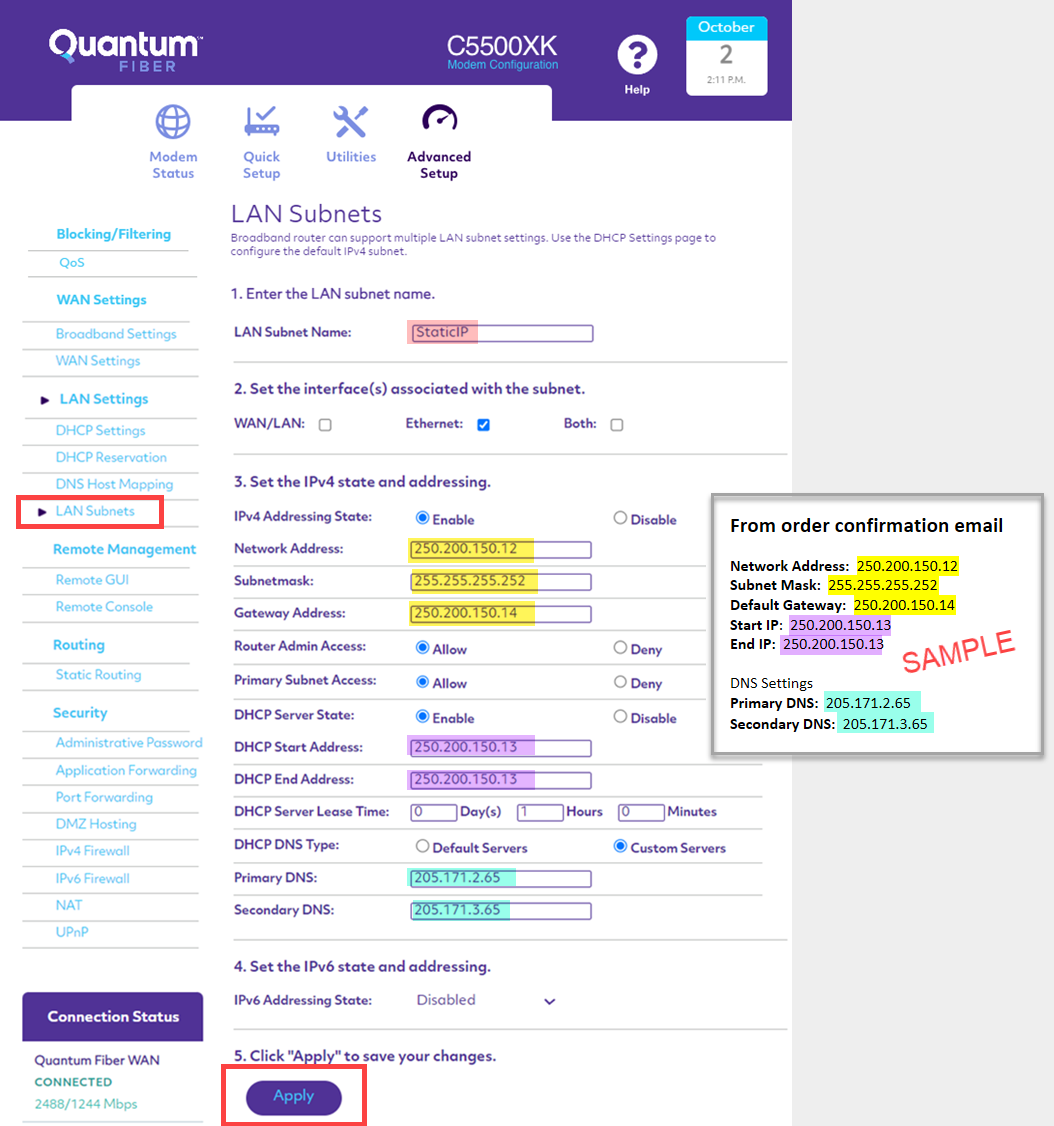
Select LAN Subnets in the left side menu. Fill in the settings as shown in the table and screenshot below.
| Section 1 | LAN subnet name | Your choice (no spaces) |
|---|---|---|
| Section 2 | Interface | Ethernet |
| Section 3 |
IPv4 Addressing State | Enable |
| Network Address | Enter from email | |
| Subnetmask | ||
| Gateway Address | ||
| Router Admin Access | Allow | |
| Primary Subnet Access | Allow | |
| DHCP Server State | Enable | |
| Start Address | Enter from email | |
| End Address | ||
| DHCP DNS Type | Custom Servers | |
| Primary and Secondary DNS | Enter from email | |
| Section 4 | IPv6 Addressing State | Disabled |
Select Apply to save your settings.
Note: The values shown in this image are examples; yours will be determined by your own static IP order.
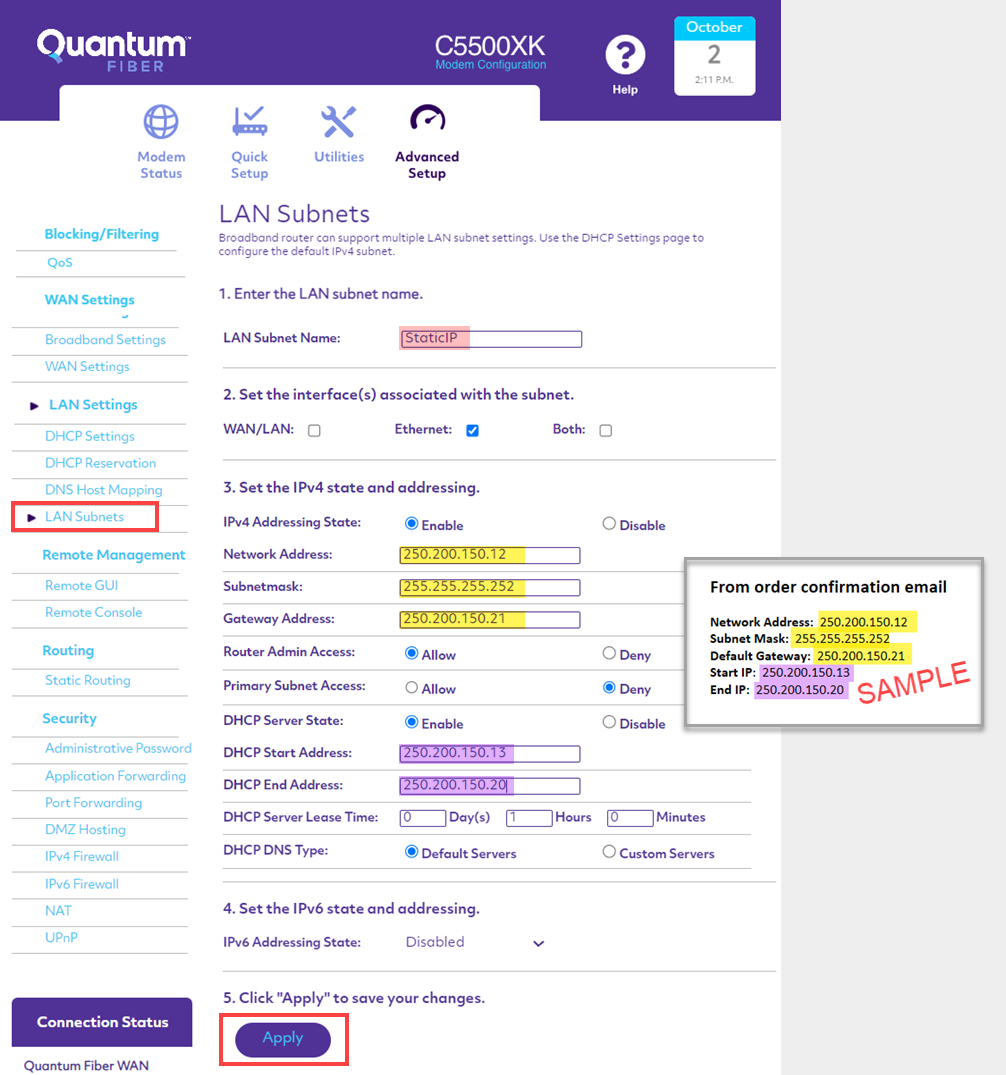
Select LAN Subnets in the left side menu. Fill in the settings as shown in the table and screenshot below.
| Section 1 | LAN subnet name | Your choice (no spaces) |
|---|---|---|
| Section 2 | Interface | Ethernet |
| Section 3 |
IPv4 Addressing State | Enable |
| Network Address | Enter from email | |
| Subnetmask | ||
| Gateway Address | ||
| Router Admin Access | Allow | |
| Primary Subnet Access | Deny | |
| DHCP Server State | Enable | |
| Start Address | Enter from email | |
| End Address | ||
| DHCP DNS Type | Default Servers | |
| Section 4 | IPv6 Addressing State | Disabled |
Select Apply to save your settings.
Note: The values shown in this image are examples; yours will be determined by your own static IP order.
Finally, to configure your own personal equipment, such as a router or computer, you will need to enter the Start Address (Start IP) into the device's Static IP settings.
Need more help? Chat with us here, in the app, or from the account portal. If you prefer to call, that's an option.
Related topics
-
Equipment FAQs -
Equipment troubleshooting -
C5500XK SmartNID -
C6500XK SmartNID
Get the app


Manage your Quantum Fiber account
Was this information helpful?
© 2026 AT&T Intellectual Property. AT&T and globe logo are registered trademarks of AT&T Intellectual Property. All other marks are the property of their respective owners.


© 2026 AT&T Intellectual Property. AT&T and globe logo are registered trademarks of AT&T Intellectual Property. All other marks are the property of their respective owners.